It’s recommended but optional.
To enhance your email deliverability, you can enable and configure DKIM for your domain. Follow these straightforward steps to enable and set up DKIM:
-
-
- Go to the “Domains” section.
- Select your domain and click on the right 3 dots to open the menu, then click on “View DNS”.
- Check if the DKIM feature is already enabled for your email accounts, If not enable it by clicking on the right sidebar “Enable DKIM“.Note: If it is displayed as ‘Disable DKIM,’ as shown in the photo, it indicates that DKIM is already enabled, and you can proceed to the next step.
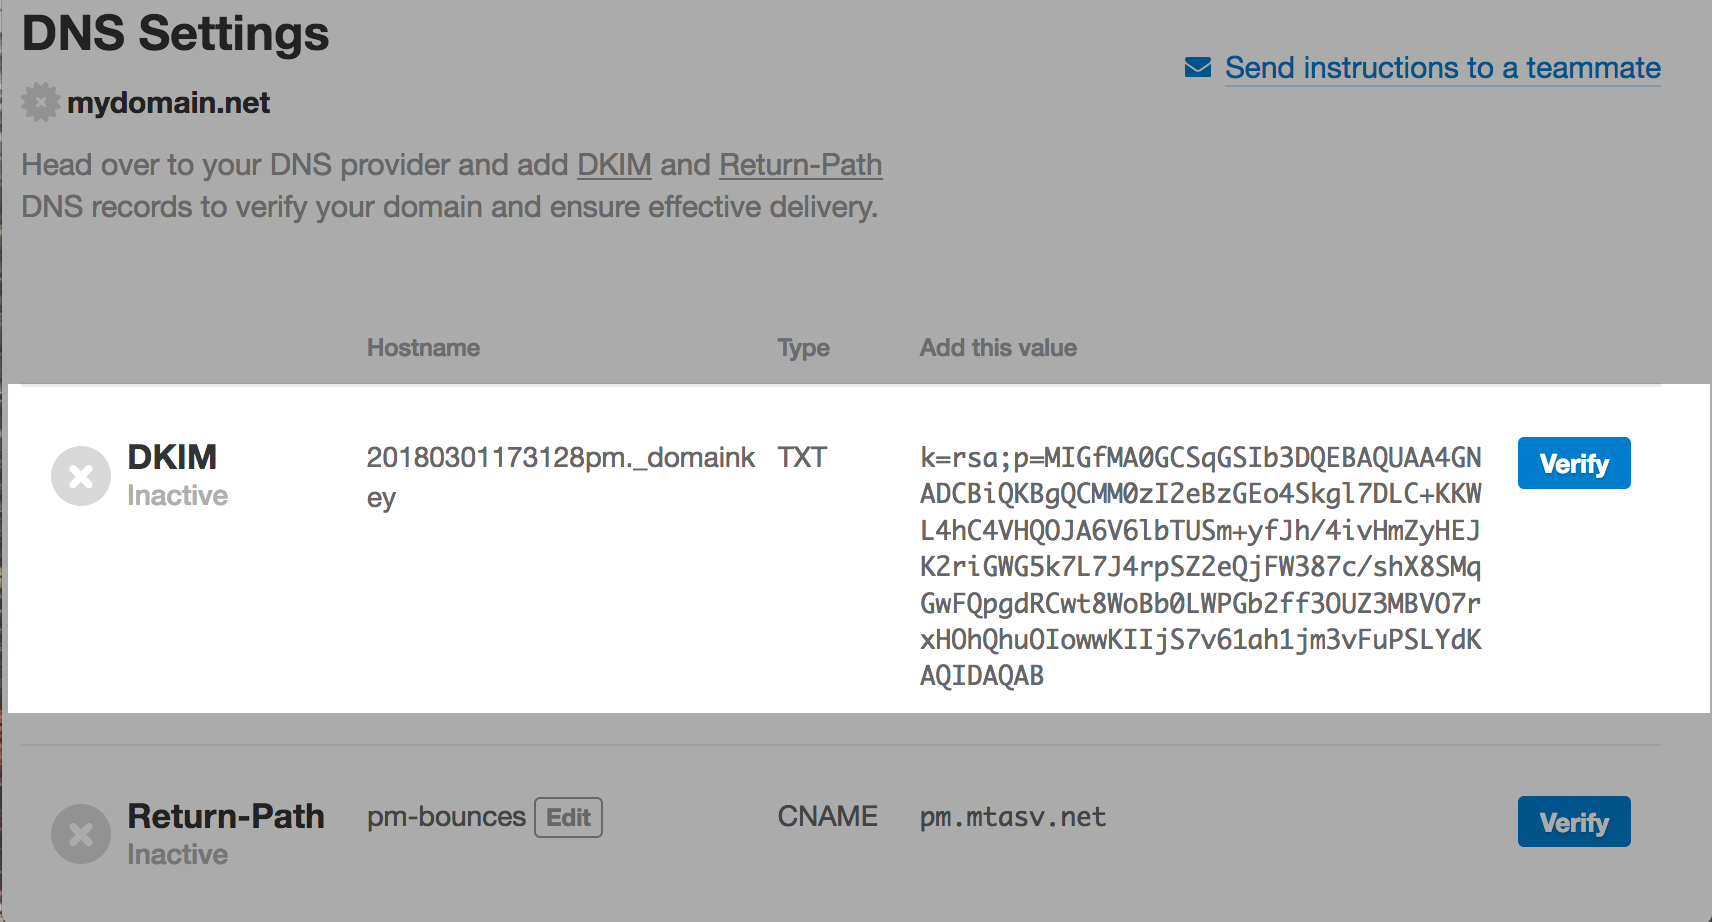
- A new DNS pop-up will appear.
- Copy the DKIM key from the DNS management within the Advanced Mail Manager, which was previously generated for you and follows the following format:
Hostname: dkim selector
Value: “v=DKIM1; k=rsa; p=MIIBIjANBgkqhkiG9w0BAQEFAAOCAQ8AMIIBCgKCAQEA76dPAW7hNPUMjODOFlQvLQSAkQ37thRpU3uTGqmcmW4ClxjVIN0goYVk01eocqO66W6gz/yDWYxW+FAbJlQ/KrAAq1ZpQ…..” Replace this with the actual value from your DNS management page.
Type: TXT
TTL: It’s recommended to set it to 300 or lower if possible. - Create the above record to your domain’s DNS management(Your domain provider), just as you did with the SPF and MX records.
-
Congratulations! You’ve successfully enabled and configured the DKIM record for your domain.
We suggest verifying the validity and visibility of these records using this online tool: MSG25 DKIM Lookup.

4 Comments