Use Forwarders For Both Email Alias Or Forwader
Forwarders allow you to direct incoming mail to a different address. For example, assume you wanted e-mail sent to [email protected] and [email protected] to arrive at the account [email protected]. You can create two forwarders that will let you do this.
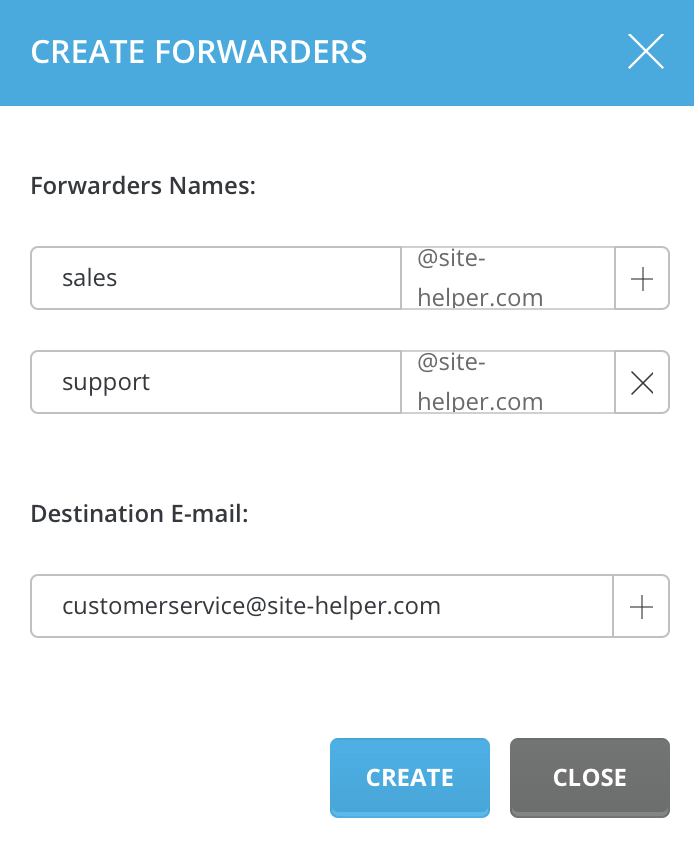
To create a forwarder, first access the “Control Panel” from the service. Next, click on the “Forwarders” link and then click the “Create E-mail Forwarder” button at the top of the page. You will see a box like this:
Enter the forwarder name, and destination address, and then click the “Create” button. Note you can forward to multiple addresses by simply pressing the “+” button at the left corner of the first forwarder name.
Other valid forward values are:
- :fail: will return a failed message to the sender.
- :blackhole: will accept the email and discard it.
You can create forwarders from the email hosting or from the Advanced Mail Manager in the Client Area.
Click on “Advanced Mail Manager”, navigate to forwarders, and set up the correct settings.


